If you're here, you probably want your maps to look the way you envision them—not just what’s in the base set. That’s what custom assets are for. If you've got your own images—props, textures, objects—you can upload them straight into TileForge and drop them into your maps like any other asset.
Here’s how to do it.
Step 1: Get Access (Yeah, You’ll Need to Be a Patron)
Custom uploads aren’t part of the base package. You’ll need to be a TileForge Patron. That support helps keep the lights on and the features coming, so fair enough.
Check If You’re Already In
Go to your Dashboard. Look for an “Asset Manager” link.
If it lets you in, great—you’re set.
If it doesn’t, you’ll see a message explaining you need to be a patron.
Not a Patron Yet?
Hit the "Become a Patron" button. That’ll send you over to their Patreon page.
Or head to your Settings in TileForge to link your Patreon account if you’ve already signed up.
Link It Up
Once you’ve joined on Patreon:
Make sure your TileForge and Patreon accounts are actually connected. You’ll do that from TileForge’s Settings page.
When that’s sorted, you’ll have full access to the Asset Manager.
Step 2: Upload Your Assets
This is where you start getting your own images into the system.
Get to the Right Place
Head to the Asset Manager (via your Dashboard or go to
/asset-manager)Switch to the Upload New Asset tab.
Know Your Limits
For now you’ve got an asset quota— 500 images, for everyone. This is a temporary limit as I am unsure what the proper limit should be. We're going to monitor usage for the first few months and see what it looks like. If people need more than 500 assets, I'll likely build out something to ensure your images are optimized after uploading (I'd rather build other features on the list if this not an issue to start with). You’ll see a counter at the top showing how many you’ve used.
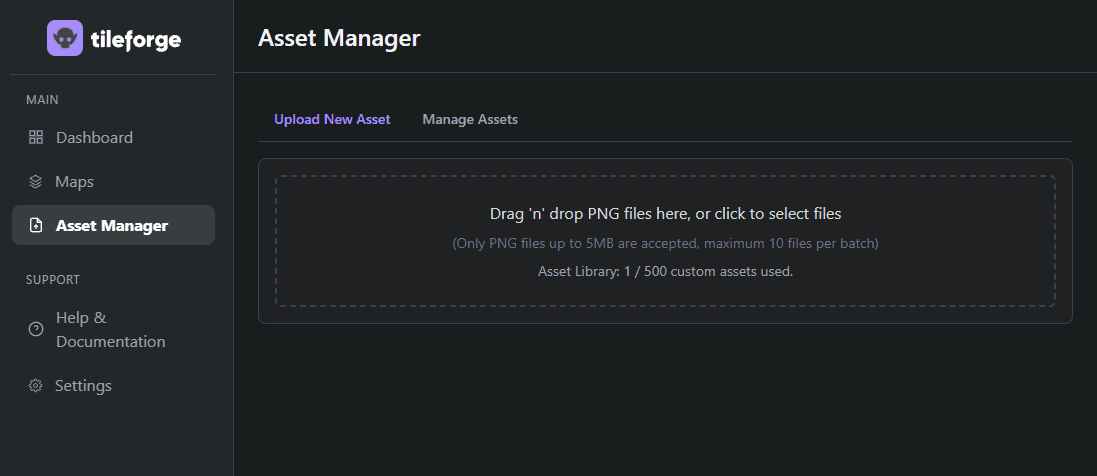
Upload Your Files
You’ve got two options:
Drag & Drop: Grab your PNGs and drop them into the upload box.
Click to Select: If you prefer a file browser, you can do that too.
What TileForge Accepts:
PNGs only
Max size: 5MB per file
Up to 10 files at once
Add Metadata (Do Yourself a Favor)
Once the files are in the queue, give them proper names. “image_001.png” won’t help you later. Call it “Stone Altar” or “Cracked Statue” or whatever makes sense to you.
I find it easiest to name the files before you upload, as it will default to the file name.
Right now, all assets default to the “Object” type. That’ll change in future updates, but it’s good enough for most props, creatures, furniture, etc.
If you added something by accident, just remove it from the list before hitting upload.
Send It
Click the Upload button. You’ll get a play-by-play of what’s happening—uploading, storing, confirming.
When it’s done, you’ll see a success message. If anything failed (wrong file type, too big), you’ll get a heads-up.
Step 3: Manage Your Assets (So Future You Doesn’t Hate Past You)
Switch to the “Manage Assets” Tab
This is your full gallery of uploaded assets.
Use the search bar if things start getting crowded. Descriptive names help a lot once you’ve got dozens or hundreds of images.
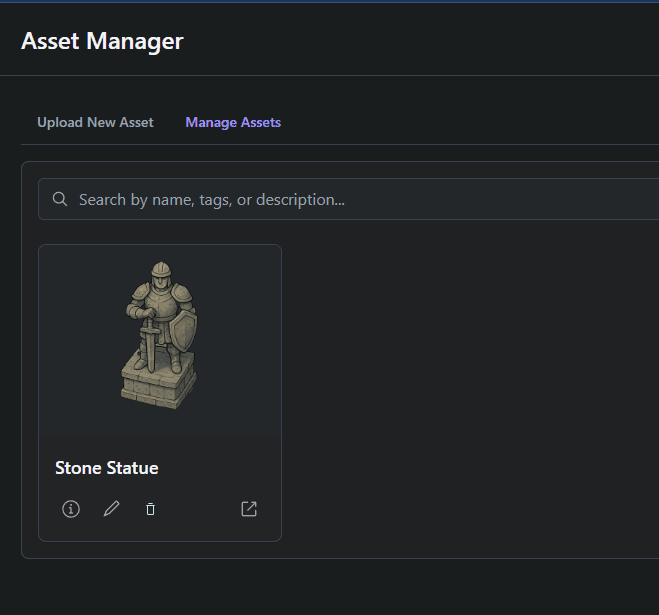
What You Can Do
Each asset has a few buttons:
Info: See the image and its metadata.
Edit: Rename it
Delete:
If the asset’s used in a map, TileForge will warn you.
Deleting used assets replaces them with a placeholder—could be fine, could be chaos. Be sure.
Otherwise, confirm and it's gone for good. No undo.
Open in New Tab: View the raw image directly.
Step 4: Use Your Assets in the Map Editor
The reason you’re doing all this.
Load Up a Map
Open an existing map or start a new one in the TileForge editor.
Open the Texture/Object Picker
Look for the panel where you usually grab standard objects and textures.
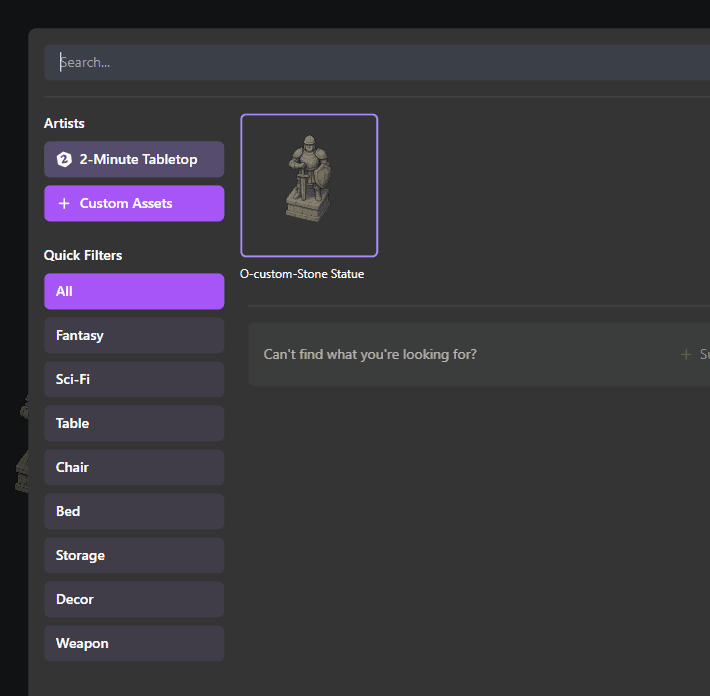
Filter by Custom Assets
You should see a filter or tab for Custom Assets.
If you don’t see them:
Make sure the filter is active
Refresh the editor page if you just uploaded them
Double-check that your Patreon is still linked and active
If it says “You don’t have any custom assets,” head back to the Asset Manager
Drop Them In
Click your asset, then click the map. That’s it. Same as with any stock asset.
A Few Pro Tips
Name Things Wisely: “Barrel” is fine. “Barrel_Burning_Trap” is better when you’re searching through a huge library.
Keep an Eye on Your Limits: Hit your quota? You’ll need to delete old stuff before uploading more (or message me - I'm trying to dial in what limits should be).
Optimize Big Files: Don’t upload a 15MB monster image. Compress it a bit—keep it under 1MB without killing the quality.
Expect a Multi-Step Upload: It sanitizes your files, gets secure URLs, uploads directly to cloud storage, and confirms. It’s built to be solid, not flashy.
If Something Breaks
Check your Patreon status first.
Make sure files are PNGs and under 5MB (under 1MB is even better).
Refresh the editor if assets don’t show up.
If all else fails, reach out to me at hello@tileforge.com or on our Discord
That’s it. Upload what you need, organize it smartly, and get back to building maps your players will remember. No more limitations—just your maps, your way.
About Jessy
Jessy is one of the two creators behind TileForge. He's spent the last 12 years as a dungeon master, TTRPG player, writer, and overall nerd.